Shopify Integration Setup
Last updated: September 30, 2026
Prerequisites
Admin access to your Shopify store
Admin access to Luminous
Step 1: Create a Custom App in Shopify
Log into your Shopify Admin.
Click Settings (bottom-left).
Go to Apps and sales channels.
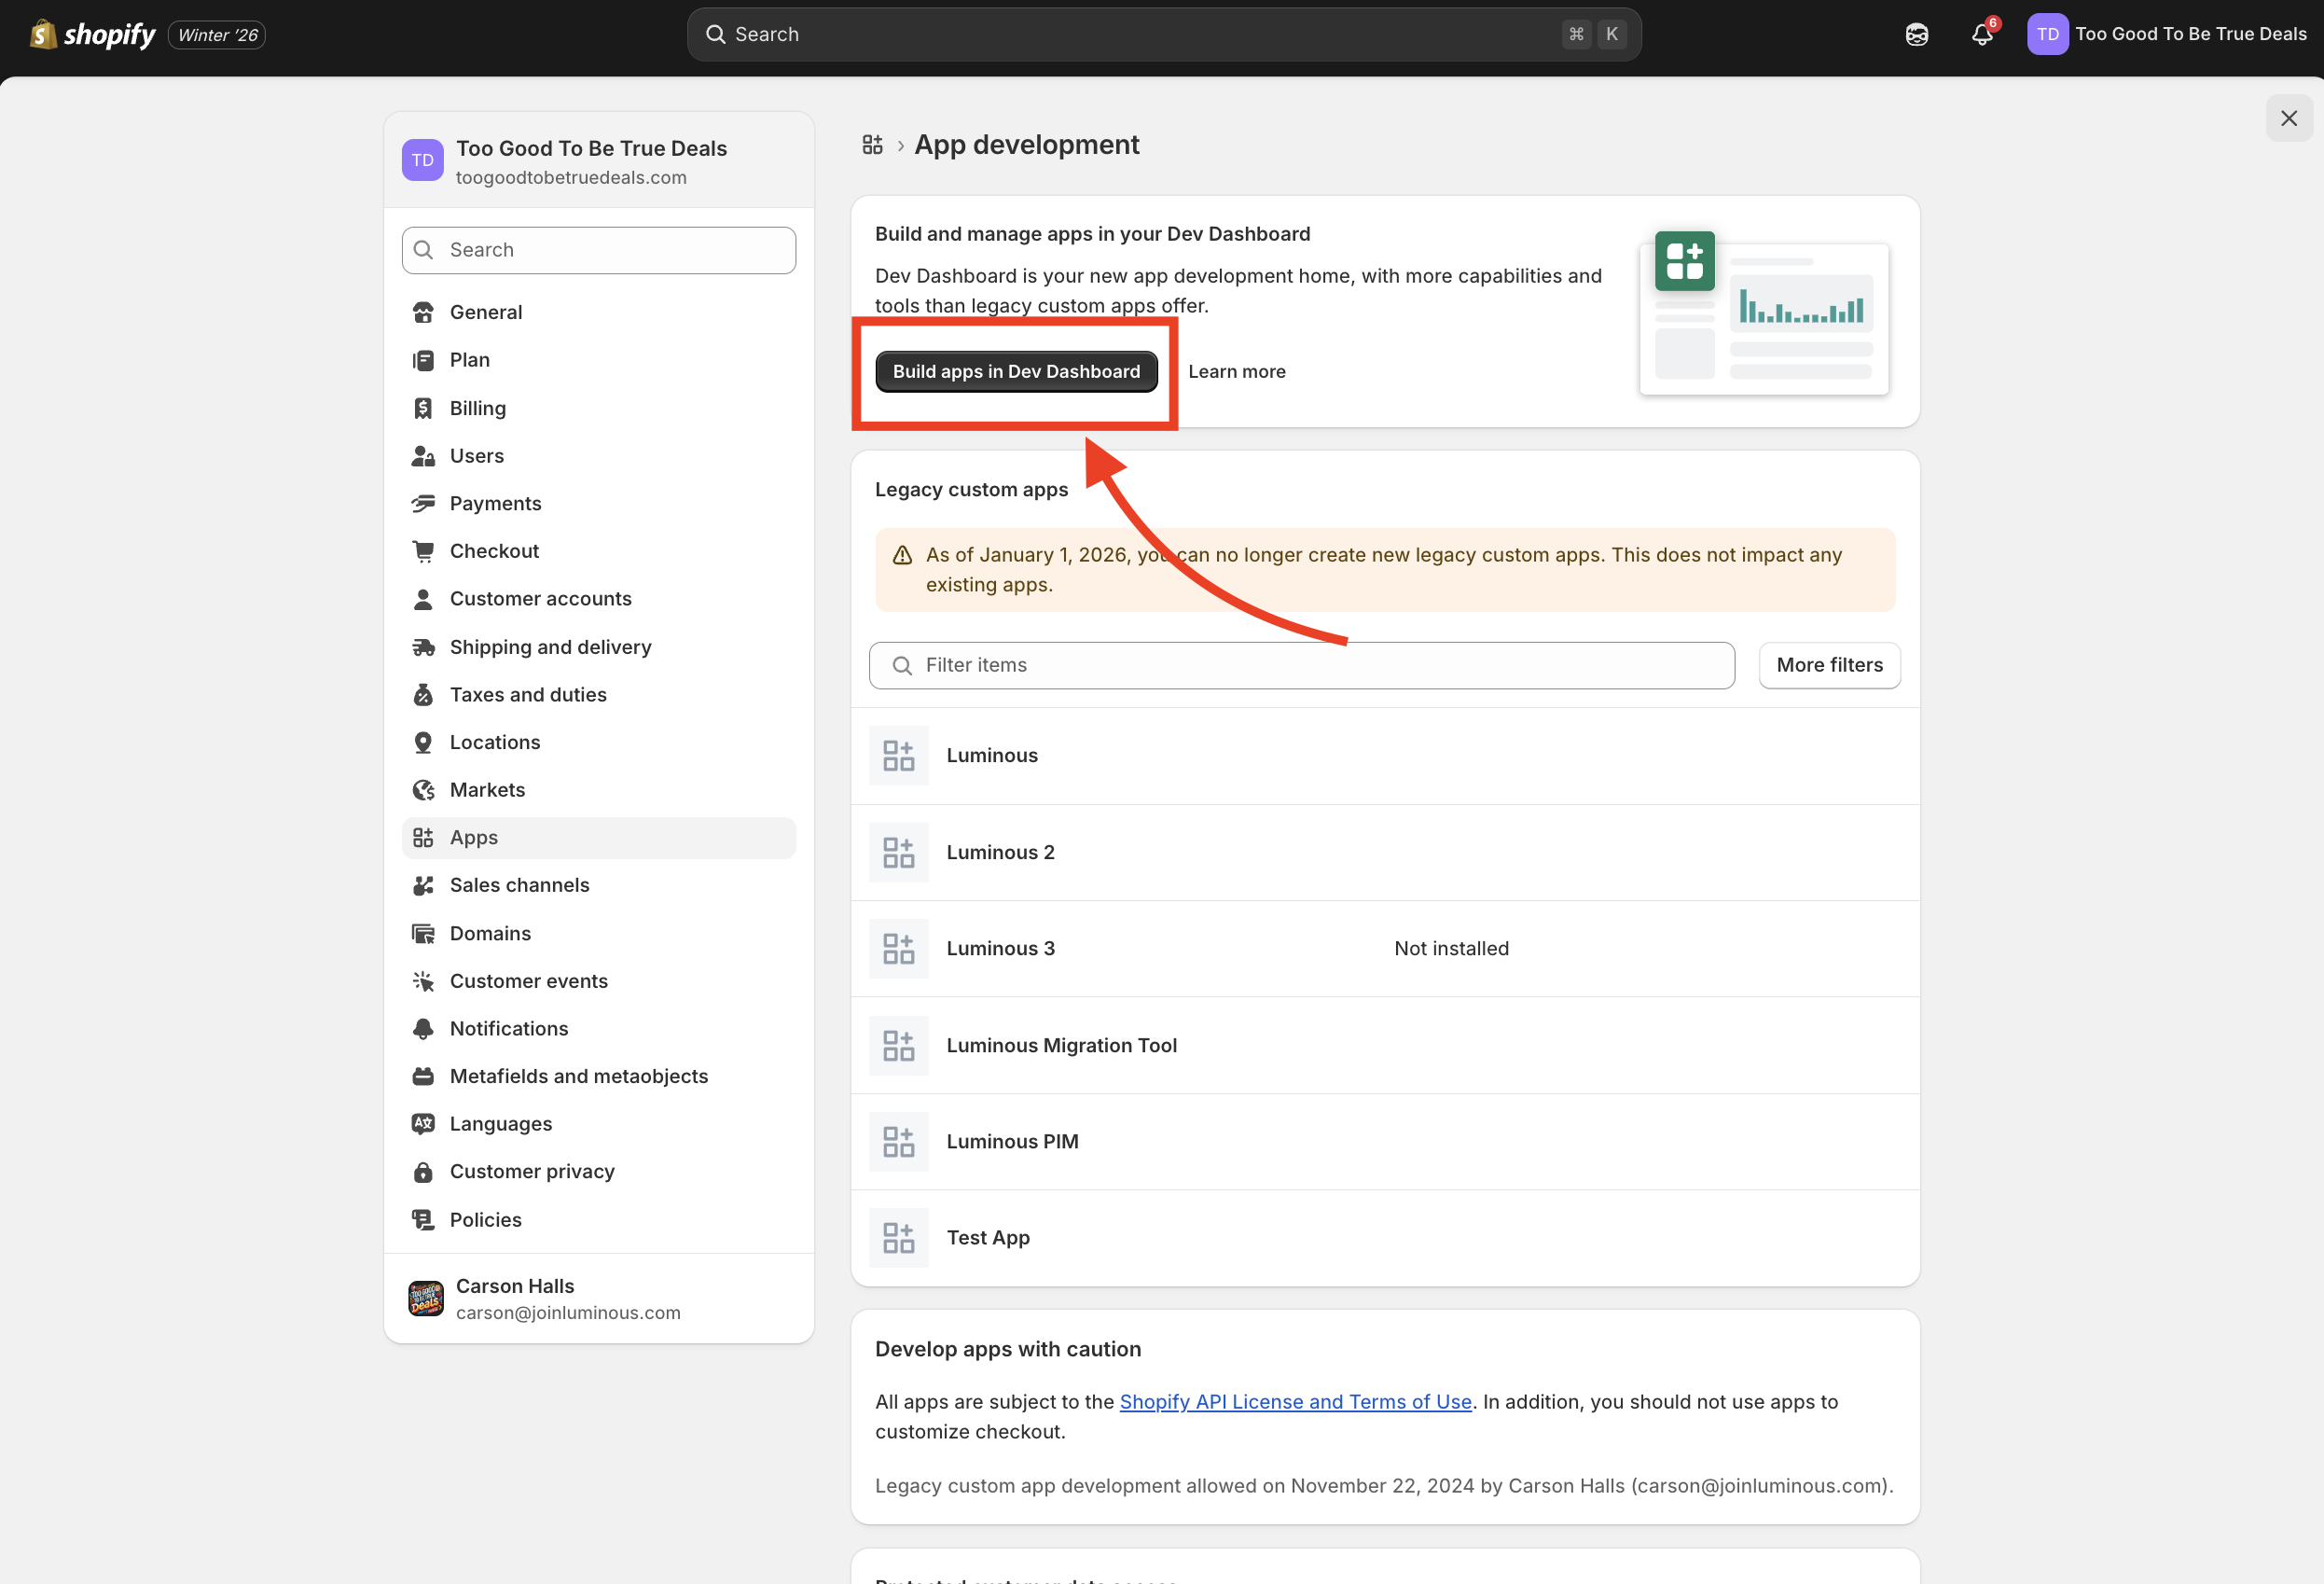
Click Develop apps.
Click Build apps in Dev Dashboard.
This will take you to a new tab with the Dev Dashboard.
You’ll now see a list of apps you’ve created (or an empty list if this is your first one).
Step 2: Create the App
Click Create app.
Name the app (example:
Luminous IntegrationorLuminous).Click Create app.
Once created, you’ll be taken to the app configuration screen.
Step 3: Configure API Scopes
Scroll to the Access section.
Find the section here labeled scopes.
Paste a comma-separated list here (provided in this documentation below).
⚠ Make sure the scopes are comma-separated.
Required Scopes
Add all of the following scopes to your Shopify app. These permissions allow Luminous to sync products, inventory, orders, fulfillments, and tracking updates correctly.
Easy-to-Read Scope List
Inventory
read_inventorywrite_inventory
Locations
read_locationswrite_locations
Products
read_productswrite_productsread_product_feedswrite_product_feedsread_product_listingswrite_product_listings
Orders
read_ordersread_all_orderswrite_ordersread_draft_orderswrite_draft_ordersread_order_editswrite_order_edits
Fulfillments
read_fulfillmentswrite_fulfillmentsread_assigned_fulfillment_orderswrite_assigned_fulfillment_ordersread_merchant_managed_fulfillment_orderswrite_merchant_managed_fulfillment_orderswrite_metaobjects, read_metaobjects
Copy‑Paste (Comma‑Separated) Scope List
Paste the following exactly as-is into Shopify’s Admin API access scopes field:
read_assigned_fulfillment_orders,write_assigned_fulfillment_orders,write_draft_orders,read_draft_orders,read_fulfillments,write_fulfillments,write_inventory,read_inventory,write_locations,read_locations,read_merchant_managed_fulfillment_orders,write_merchant_managed_fulfillment_orders,write_order_edits,read_order_edits,read_orders,read_all_orders,write_orders,read_product_feeds,write_product_feeds,read_product_listings,write_product_listings,read_products,write_products,write_metaobjects,read_metaobjects
Step 4: Disable Embedded App Setting
Scroll to the URLs section.
Untoggle:
Embed app in Shopify admin.
Step 5: Release the App
Click Release (top-right corner).
Ignore the optional rename prompt.
Wait for the app to finish releasing.
You may see version numbers appear—these can be ignored.
Step 6: Install the App on Your Store
From the app’s home page, find the Install app box on the right.
Click Install app.
Select the correct Shopify store.
Review the permissions list to confirm the scopes.
Click Install.
You can close out of the confirmation page afterward.
✅ To verify installation, the install count should change from 0 to 1.
Step 7: Copy Shopify API Credentials
Open the app you just installed in the dev dashboard (this can be found by clicking Build Apps in dev dashboard.
Go to Settings
Copy the following:
Client ID
Client Secret
Keep these handy—you’ll paste them into Luminous next.
Step 8: Add Shopify Integration in Luminous
Log into Luminous.
Click your name (top-right).
Go to Settings / Integrations.
Click + Add Integration (top-right).
Select Shopify, then choose Direct connection.
Fill in the Fields
API Key / Client ID → paste from Shopify
Client Secret (Optional - New Method) → paste from Shopify (click Show 10 settings you can adjust after connecting to reveal it)
Admin Access Token (Legacy) → leave blank (auto-fills later)
Step 9: Find Your Store Slug
Go to your Shopify store admin (not the Dev Dashboard).
Look at the URL:
Example: https://admin.shopify.com/store/{store-slug}/settings
Copy everything between
/store/and/settings.Paste this into the Store Slug field in Luminous.
Add a label if desired (example: Main Shopify Store).
Step 10: Configure Integration Settings
In the expanded settings (Show 10 settings you can adjust after connecting):
Toggle Get Products ✅
Toggle Show Inventory Location ✅
Click Test connection.
Expected Result
✅ Credentials are valid and all required scopes are available
Step 11: Save & Verify
Click Save to complete setup.
Refresh the integration.
Click the pencil icon (edit).
You should now see:
Admin Access Token auto-filled
Credentials still passing when re-tested
✅ Setup Complete
Your Shopify store is now successfully connected to Luminous.
Orders will sync
Tracking numbers will update
Inventory locations are available
If you run into issues or have questions, reach out to the Luminous team for support.